Saturday 29 December 2012
Penmaenpool MPD WIP December 2012
More progress has been made on the Penmaenpool MPD module.
Once the "gloop" had dried overnight, a base layer of the ubiquitous hanging basket liner has been glued down ready for more scenic material to be added over the top of it.
These pictures show work in progress from the viewing side of the module.
Also note that the advanced down starter signal has been permanently installed, wired and tested (more about that in a future post) the signal has also been blended in to the scene by even more "gloop"!
Also visible in this picture are the engine men's rest room (Bothy) lamp hut and grounded van body (Pway dept) along with one of the working yard lamps.
In this picture,The coal stage, water tank and fitters office along with more hanging basket liner!
Note that the rails on the running line have been rusted and ready for ballast.
The yard tracks and turnout has been well and truly "blended in" with more "Gloop" I was going to use DAS clay as per Chris Nevard but Gloop is good!
The 3 plank wagon is there to check that all flangeways are clear after the Gloop was applied.
For the curious, "Gloop" is a mixture of Pollyfilla, PVA, Water and black emulsion paint. (You can use other colours). Mixed to a consistency of porridge and applied with a half inch paint brush. Most of the layout has been covered with about 4 coats of the stuff! Great stuff it is too,if you like playing with mud pies! It dries hard and if chipped won't show white like Pollyfilla alone would do.
Any time available for work on the module over the next day or two will be spent ballasting the running line.
I love ballasting, time consuming I know but I find it very therapeutic!
Another update as and when.
Cheers to all thanks for reading and happy new year!
Frank
Friday 21 December 2012
Oh! Christmas Tree, Oh! Christmas Tree.
Christmas is fast approaching time to get the trees out!
No, not THE Christmas tree,but, my model trees being made at Christmas!
I'm going to need quite a few trees and bushes for my second Cambrian module Penmaenpool MPD.
To buy ready to plant trees from Wooland Scenics or Treemendus would cost a small fortune so it's down to me to make some.
The method I've always used is the twisted wire method but this takes a long time to make each individual tree. What was needed was a quick and easy way of making trees
I picked up some Woodland Scenics plastic armatures from my local model shop. These were intended to be used individually to make trees approx 2 inches high. (not very big in 4mm scale) so I came up with this idea.
The trunk of the tree is a length of 4mm dia plastic or brass tube. The branches from the Woodland Scenics kit being glued to the trunk with cheap super glue. I chose the branches to suit as I went along.
The next stage is to form the trunk proper using Milliput epoxy putty smoothed with water.
Once the Milliput has set, usually overnight, The trunks were painted using Humbrol 66 dark grey.(matt)
This takes the plastic look away from the branches and covers the Milliput OK too.
Finally, once the paint is dry, The foliage is added. I used a "Greenscene" foliage mat for this one but, again Woodland Scenics do something similar.
That's it! OK they are not up to Pendon standard but, as I need so many for this layout I can easily plant some better ones towards the front with these behind to bulk up the wooded areas.
With that I will take this chance to say Merry Christmas to all my readers, I hope you all have a great time around your own Christmas Trees!
Cheers
Frank
Tuesday 11 December 2012
Take a brake, build a Kwik Kit!
Still not done anything much on the two dogs project. Been rather busy trying to finish a load of loose ends between now and Christmas.
One such project is this Dapol BR standard brake van kit that was started several months ago after being bought some 12 months before that! As you can tell I tend to take time to get a "Round Tuit"
I remember these kits when they first came out made by Airfix cica 1962 I Think.
Now, considering the moulds and tooling used for these models are getting on for 50 years old.the parts still fit well.
Anyway as I digress again.....
A couple of afternoon sessions on the workbench saw the job finished and added to my expanding fleet of goods vehicles.
No pictures of WIP I'm afraid just a couple of shots of the finished job.
Shown here alongside my fire damaged job! Included again here because the burn out was built from the same kit with some drastic alteration of course!
I was reading Phil Parker's blog recently, and it transpires we both hit on the same idea with regard to painting BR bauxite stock.
Now if I was a pedant or rivet counter I would go out and purchase the correct Railmatch acrylic or Phoenix Precision enamel paint, but, I am NOT a pedant or top modeller so I use Humbrol "Red Brick" enamel as a substitute for bauxite. Once it is weathered or faded a bit I doubt if the real pedants would notice(???)
It's not a money saving thing, It just means less tins of paint to store, dry out and throw away!
I also took the opportunity to try out some Carrs weathering powders I picked up from Warley exhibition.
I must say first impressions are good. I did find though that applying some over the transfers too quickly after varnishing is not a good idea!
Just one more picture taken from the opposite angle to the one above showing more of the burnt out brake van.
I have a few more little jobbies and "Kwik Kits" I would like to do befor Christmas so I had better stop waffling and get on with it!
Cheers!
Frank
Saturday 8 December 2012
Time out on the Prairie
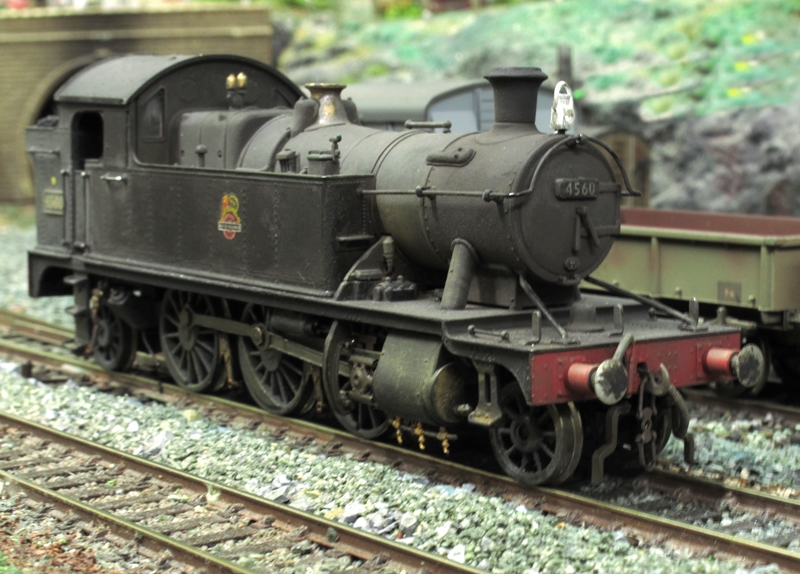
By way of a little interlude from the "Two Dogs" project I dug my old Bachmann 45xx Prairie tank out of the top drawer and thought it was about time I did something with it!
When shopping for bits and pieces at the Warley exhibition I picked up a few sets of GWR cab side etched plates from Garry Wells at 247Developments.
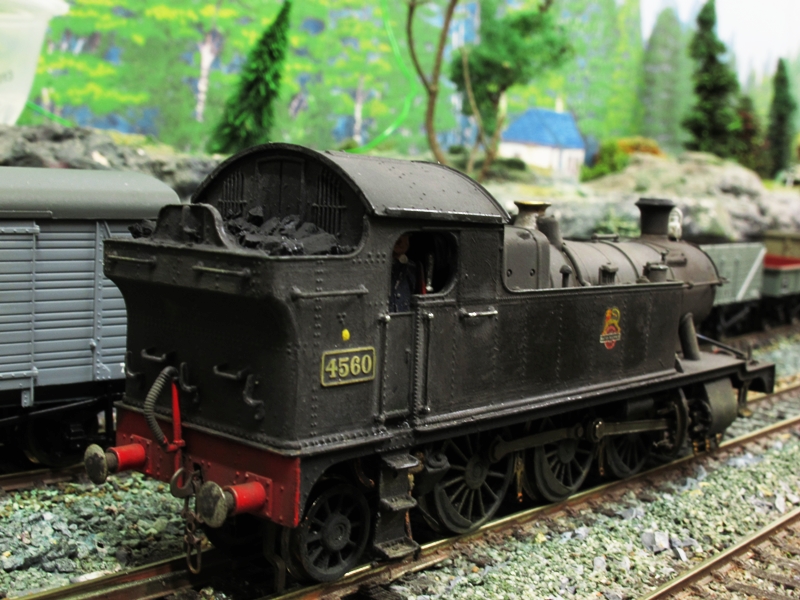
Cambrian based 2-6-2T No 4560 being one of them.
The loco as it came to me second hand and a good runner was finished in BR lined green with late crest, whereas me without trying to be pedantic wanted BR black (unlined) with early crest.
I stand to be corrected but, i do not recall any 45xx's on the Cambrian in green/late crest livery. All the pictures I have seen bear this out.
Anyway enough of the preamble!
This is what it looks like now....
The original crest and lining was removed by gently rubbing away with a cotton bud soaked in enamel thinners. The hardest part of the job was removing the simulated coal from the rear bunker.
This is one of my pet hates to be honest. Why can't the manufacturer supply models wit empty bunkers and tenders and supply "Coal" in a plastic bag with all the other bits that come with RTR locos these days?
Once cleaned up the whole loco was brush painted with Humbrol matt black.
Transfers were then added along with the etched plates and then the weathering was done using Tamia and Carrs weathering powders and B&Q "Jet Black" emulsion paint. Real coal was then added to the bunker and stuck down with diluted PVA glue.
The wheels and motion got my usual treatment of Humbrol Mid grey mixed with a little talcum powder for the wheels and Humbrol gloss Tan with some matt black for the coupling and con rods,
Steam heat and vacuum pipes along with Smiths screw link couplings complete the job.
I have also added some home made fire irons to the tank top on the fireman's side (not visible in these photos)
The bottom line is that I now have the loco I wanted for a couple of afternoons work on the workbench.
Back to the "Bulldog Bash" on Monday!
Cheers!
Frank
Sunday 2 December 2012
A tail of two dogs (Part 6) It runs!
Progress at last!
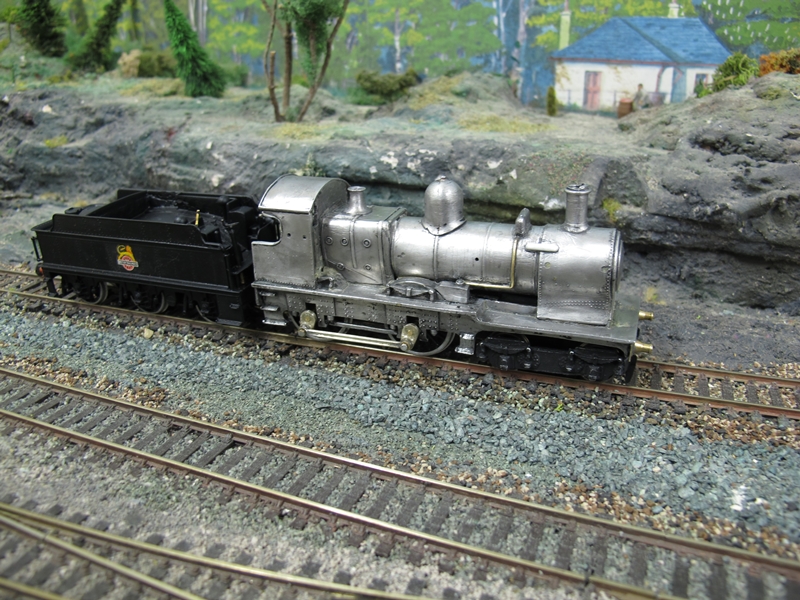
After the disaster of a few weeks ago with the "Dukedog" chassis and motor failure another attempt was made on getting a working chassis.
I had to wait until the Warley National model railway exhibition (where I was assisting a fellow CHMRC member with his layout operations) to purchase the necessary parts from Comet Models.
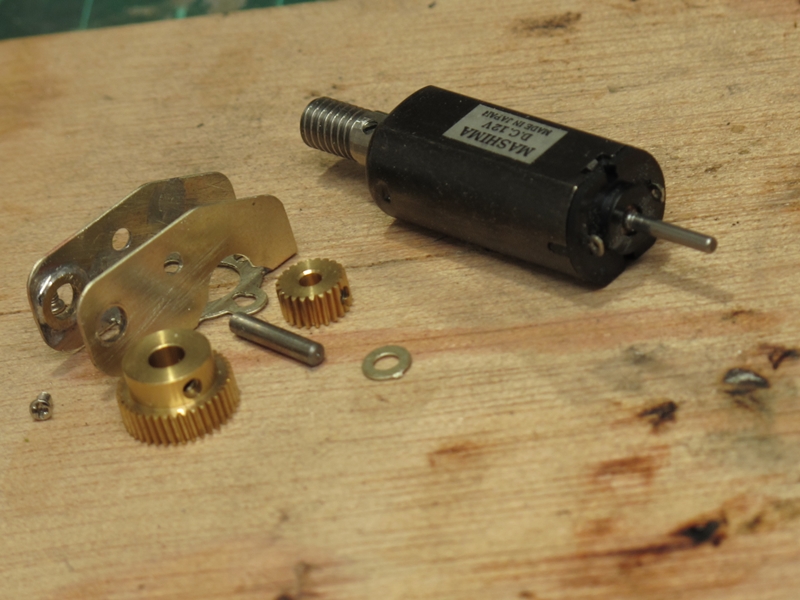
I chose to use their GB5 gearbox and Mashima 10 series motor, (Shown below)
Assembly is straight forward, The bearings are soldered in place and the gearbox is folded up and checked for alignment before soldering the fold joints to strengthen up the gearbox. The Comet GB5 is a double reduction type ideal for this job because it allows the motor to be clear of the frames.Anyway, to cut a long story short, the gearbox, motor and front axle were assembled in about 20mins and put on test.
within a few seconds of starting the motor/gerbox was running as sweet as a nut! so quiet in fact that you had to look to see it running! on the test controller results were very pleasing, the motor current was minimal and slow running was reasonable. I am confident that once run in the combination will work well.
I spent the next day assembling the rest of the chassis, fitting Markits outside cranks and making my own connecting rods as the model I am building 9021 had fluted rods not plain as supplied by K's kits.
The chassis was fitted to the locomotive along with the front bogie and tender. The electrical pick up is just from the tender front and rear axles at the moment until I can get some more phosphor bronze strip.
It was now crunch time! would it run or not? I must admit I was a bit apprehensive about this, When I got the motor I was surprised how small it was Would it pull the weight of the whitemetal body let alone any train
Not having a working layout at home at the moment the only way I could find out was to take it to the CHMRC club rooms and try it on our test track.
Well, the bottom line is IT RUNS! I was really surprised how smooth the chassis is, despite the sparse pick ups and state of the track it ran remarkably well. After a few circuits of the test track it was back in it's box for there is still a lot of detail to be added before it goes to the paint shop.
More on the final assembly and finishing soon!
Cheers!...... Frank
Subscribe to:
Posts (Atom)


